Showing posts with label sailing injuries. Show all posts
Showing posts with label sailing injuries. Show all posts
Sunday, May 4, 2014
The Side Netting Caught Me!
I have said in the past that one of the most dangerous things we do is get on and off a boat.
Last Friday, I got off the boat. As in, I moved off the boat. The moving truck picked up my belongings in one town. We were going to stop by the boat and load more things in the truck, but we were in the middle of what turned out to be record-breaking rain in some places, and we decided to just go to the apartment.
Later, of course, I had to go back to the boat. There were a couple of things that I had to get that day, in spite of the rain: my cat, and her kitty litter box.
I got the cat off first, no problem. But I was tired, and I slipped while getting the clean kitty litter out of the cabin. I spilled kitty litter into my shoe, down the companion way steps and into the cabin. Oh snap!
What I didn't realize was that I also stepped in some of the litter. Murphy noticed, however.
As soon as I put that litter-encrusted shoe on the side deck outside the cockpit, it turned to extremely slippery clay mud. Down I went, most of my weight on the top of my left knee. I felt my body be caught by the netting on the side of the boat. If the netting hadn't caught me, I would have gone into the marina, already injured (my knee did not like that landing), in the rain and with no one around anywhere.
Of course, netting won't help you unless you are on your hands and knees ... but Murphy had already seen to that. Instead of having a much worse accident, I got up, got safely home and washed off my shoes.
Needless to say this incident has made me a believer in side netting. I was going to add something like "particularly for older sailors," but ... NO. This could have happened to anyone (well, anyone with a cat on board!) It has absolutely convinced me that netting plus staying low if moving around the boat in rough waters is a first class idea.

Sunday, January 26, 2014
You COULD Go Over the Side -- Really! -- Lifelines
No smart cracks this time -- this is serious stuff
I have heard about lifelines from a couple of people ever since I got my first little sailboat. People are passionate in their beliefs about them.
For instance, there's a big debate about whether they should be clad in vinyl or not. Many owners feel the vinyl looks nicer, even though vinyl-clad cable is more expensive than bare cable. Others insist that it's extremely important to have bare cable, because vinyl can hide the first signs of rust, a sign that your lifelines could fail.
Oh my gracious -- then you could fall overboard, right?
Well, yeah, you CAN fall overboard, but it can happen if you have the newest, brighest, tightest lifelines possible.
How is that possible?
Just go stand on the side of your boat, and note where the lifeline touches your body. Unless you're a child, it's going to be WELL below your waist. This means that your center of gravity is WELL above that top lifeline (assuming you have two -- smaller boats will only have one).
The lifelines can't save you, I don't care what the "experts" say. I know a true expert who calls loose or weakened lifelines "deathlines." He's been sailing for many, many years and figured out long ago that the lifelines won't save him, but it's hard to ignore that word -- LIFEline.
Well, you have to. Words don't trump the laws of physics.
So what are they good for? They're an OUTSTANDING visual guide. They make it very, very clear where the edge of the cliff is. But once you have realized that those lifelines won't save you (and could actually encourage you to topple over), you'll realize why you want to move toward the bow from the HIGH side of the boat. On the high side of the boat, if you do fall, you'll fall toward the center of the boat -- not into the water.
What else can you do? My boat is 100% netted. I even made a frame with netting on it that lashes to my gates when they're closed. I have a coordination problem (talked about in a much earlier post), so I'm more likely than you to go over the side. Not everyone wants netting but I think it's wise for me.
The other thing you *must* do is make sure you have good handholds along the edge of your cabin top. You often see these made of teak. My boat also has a stainless steel grab bar that runs across the beam. We hear the saying, "One hand for yourself and one for your boat," and that's exactly what it means. As you move forward, you should always be holding on with one hand, and you shouldn't be holding the lifeline. You should be holding something closer to the center of the boat.
If the boat is sailing and you need to do something at the mast, move to the mast from the high side of the boat, where gravity will tend to push you toward the boat, not away from it.
Wear nonskid shoes. I don't care how many macho men tell you bare feet are best: if you break a toe, you're going to be significantly hobbled. Test their grip on your deck periodically, as the grip-holding tendencies of your shoes can wear out.
Don't count on the "life" lines to save you. Do keep them in good shape, but they are last-ditch, and in my opinion, best used by attaching netting to them.
https://www.facebook.com/boldlygosailing?skip_nax_wizard=true
So what are they good for? They're an OUTSTANDING visual guide. They make it very, very clear where the edge of the cliff is. But once you have realized that those lifelines won't save you (and could actually encourage you to topple over), you'll realize why you want to move toward the bow from the HIGH side of the boat. On the high side of the boat, if you do fall, you'll fall toward the center of the boat -- not into the water.
What else can you do? My boat is 100% netted. I even made a frame with netting on it that lashes to my gates when they're closed. I have a coordination problem (talked about in a much earlier post), so I'm more likely than you to go over the side. Not everyone wants netting but I think it's wise for me.
The other thing you *must* do is make sure you have good handholds along the edge of your cabin top. You often see these made of teak. My boat also has a stainless steel grab bar that runs across the beam. We hear the saying, "One hand for yourself and one for your boat," and that's exactly what it means. As you move forward, you should always be holding on with one hand, and you shouldn't be holding the lifeline. You should be holding something closer to the center of the boat.
If the boat is sailing and you need to do something at the mast, move to the mast from the high side of the boat, where gravity will tend to push you toward the boat, not away from it.
Wear nonskid shoes. I don't care how many macho men tell you bare feet are best: if you break a toe, you're going to be significantly hobbled. Test their grip on your deck periodically, as the grip-holding tendencies of your shoes can wear out.
Don't count on the "life" lines to save you. Do keep them in good shape, but they are last-ditch, and in my opinion, best used by attaching netting to them.
https://www.facebook.com/boldlygosailing?skip_nax_wizard=true
Thursday, November 21, 2013
The Coolest Halyard on the Planet
The other day a club member proudly showed me a very clever modification he has made to his boat, and it's worth passing on. He calls it his "geezer halyard." This sailor is in his early 70's, not ready to give up sailing, but ready for some of the harder physical tasks to be a little easier.
Meanwhile I had heard from an old friend -- my long-lost first husband, actually, the man who introduced me to sailing and got me so hooked on it that I spent nearly 40 years daydreaming about returning to the sport some day. While he is generally in good health, he had to have rotater cuff surgery not that long ago, and was looking for easier ways to handle his boat. However, this adaptation isn't just for "senior citizens." I have a thirty-year-old daughter who has also had rotater cuff surgery. The truth is that any of us can have some sort of injury at any time that could make sailing harder for us.
If you look at the picture below, you'll actually see a couple of things this clever inventor has done to make his boat easier to manage. If you see the triangular thing sticking off the mast, that's one of a series of mast steps. With those mast steps, he can still climb his own mast.
Which he did. At the top, he used a pop rivet gun to attach a piece of hardware at the *very top* of the side of the mast. He attached an extra long halyard to that hardware. before leading that halyard through its sheave at the top of the mast, he first dropped it to near the bottom, and fed it through a block attached to a snapshackle. Then he took the halyard back to the top of the mast, through the sheave, back down the mast and through turn blocks to run it back to the cabin top and cockpit. (You don't have to run your halyards back to the cockpit, but it will make the boat much easier and safer to sail single-handed.)
In the picture below, the snapshackle for his halyard is run back to a loop on the top of his StackPack. If you're going to attach your halyard to a lifeline, that will require a little more length as well, so measure appropriately.
When he's ready to sail, he moves the snapshackle from his StackPack to the head of his sail. Because of the block attached to the snapshackle, he now has 2:1 purchase on his halyard. I tried it. His halyard is remarkably easy to raise. It certainly would make the task easier not only for those with shoulder injuries, but those with bad backs or arthritis in their hands.
This sailor put his block and snapshackle together from hardware he already had, but he's going to make a few changes.
First of all, the snapshackle he used is the type that swivels. This allows the two lengths of halyard going up to the sheave to twist, so it has introduced one more thing that can go wrong while raising the sail. Below are pictures of hardware I found at West Marine, a single block, and a non-swiveling snapshackle to attach to the becket.
It's still possible to get the two lengths of halyard twisted, but it's a good practice to eyeball the entire length of your halyard to look for things it might be hung up on anyway. The block costs about $36 at West Marine, and the snapshackle about $22. It's crucial that you use stainless steel hardware. You do not want your hardware to break at the top of the mast.
Besides the extra (but avoidable) chance of a fouled halyard, there are two other downsides to this adaptation. First, you'll have a lot of extra line in the cockpit after the sail is raised. Once your halyard is raised, you're going to have extra halyard in the cockpit. One option is to take a moment and hank the dangling halyard. If your halyard has a dedicated winch, you can put a loop over the winch, and the halyard will be stowed neatly. You can also find "line bags" on line you can hang near the bottom of your mast or in your cockpit to catch that line.
Second, you will have increased the number of turns your halyard has to make as you drop it. You may find that you have to go to the mast and help encourage the sail to drop when you're ready to take the sails down.
There's one more thing you might want to note about the hardware shown above: the sheave in the block I photographed is black. It seems counter-intuitive, but black plastic is more resistant to damage from UV rays than white. A block with a black sheave in it will last longer than one with a white sheave.
Finally, make sure your halyard size runs freely through the block, and that the snapshackle is large enough to attach easily to the head of your sail. If you choose a piece of hardware with a pin in it, make sure it's of a type where the pin can't be completely removed. The halyard hardware on my first boat used a pin that could fall out, and it did within five days. Then, of course, it bounced on the cabin top and into the marina. If a crucial piece of hardware can free itself it will, laughing all the way to the bottom.
Go to our Facebook page: https://www.facebook.com/boldlygosailing?skip_nax_wizard=true
Meanwhile I had heard from an old friend -- my long-lost first husband, actually, the man who introduced me to sailing and got me so hooked on it that I spent nearly 40 years daydreaming about returning to the sport some day. While he is generally in good health, he had to have rotater cuff surgery not that long ago, and was looking for easier ways to handle his boat. However, this adaptation isn't just for "senior citizens." I have a thirty-year-old daughter who has also had rotater cuff surgery. The truth is that any of us can have some sort of injury at any time that could make sailing harder for us.
If you look at the picture below, you'll actually see a couple of things this clever inventor has done to make his boat easier to manage. If you see the triangular thing sticking off the mast, that's one of a series of mast steps. With those mast steps, he can still climb his own mast.
Which he did. At the top, he used a pop rivet gun to attach a piece of hardware at the *very top* of the side of the mast. He attached an extra long halyard to that hardware. before leading that halyard through its sheave at the top of the mast, he first dropped it to near the bottom, and fed it through a block attached to a snapshackle. Then he took the halyard back to the top of the mast, through the sheave, back down the mast and through turn blocks to run it back to the cabin top and cockpit. (You don't have to run your halyards back to the cockpit, but it will make the boat much easier and safer to sail single-handed.)
In the picture below, the snapshackle for his halyard is run back to a loop on the top of his StackPack. If you're going to attach your halyard to a lifeline, that will require a little more length as well, so measure appropriately.
 |
The "Geezer Halyard." You can see the extended halyard dropping
from the top of the mast, through a block, and back up again.
|
When he's ready to sail, he moves the snapshackle from his StackPack to the head of his sail. Because of the block attached to the snapshackle, he now has 2:1 purchase on his halyard. I tried it. His halyard is remarkably easy to raise. It certainly would make the task easier not only for those with shoulder injuries, but those with bad backs or arthritis in their hands.
This sailor put his block and snapshackle together from hardware he already had, but he's going to make a few changes.
First of all, the snapshackle he used is the type that swivels. This allows the two lengths of halyard going up to the sheave to twist, so it has introduced one more thing that can go wrong while raising the sail. Below are pictures of hardware I found at West Marine, a single block, and a non-swiveling snapshackle to attach to the becket.
 |
| Hardware used to connect your 2:1 halyard to the head of your sail |
It's still possible to get the two lengths of halyard twisted, but it's a good practice to eyeball the entire length of your halyard to look for things it might be hung up on anyway. The block costs about $36 at West Marine, and the snapshackle about $22. It's crucial that you use stainless steel hardware. You do not want your hardware to break at the top of the mast.
Besides the extra (but avoidable) chance of a fouled halyard, there are two other downsides to this adaptation. First, you'll have a lot of extra line in the cockpit after the sail is raised. Once your halyard is raised, you're going to have extra halyard in the cockpit. One option is to take a moment and hank the dangling halyard. If your halyard has a dedicated winch, you can put a loop over the winch, and the halyard will be stowed neatly. You can also find "line bags" on line you can hang near the bottom of your mast or in your cockpit to catch that line.
Second, you will have increased the number of turns your halyard has to make as you drop it. You may find that you have to go to the mast and help encourage the sail to drop when you're ready to take the sails down.
There's one more thing you might want to note about the hardware shown above: the sheave in the block I photographed is black. It seems counter-intuitive, but black plastic is more resistant to damage from UV rays than white. A block with a black sheave in it will last longer than one with a white sheave.
Finally, make sure your halyard size runs freely through the block, and that the snapshackle is large enough to attach easily to the head of your sail. If you choose a piece of hardware with a pin in it, make sure it's of a type where the pin can't be completely removed. The halyard hardware on my first boat used a pin that could fall out, and it did within five days. Then, of course, it bounced on the cabin top and into the marina. If a crucial piece of hardware can free itself it will, laughing all the way to the bottom.
Go to our Facebook page: https://www.facebook.com/boldlygosailing?skip_nax_wizard=true
Sunday, October 27, 2013
Various Updates
Or, New Information on Old Topics
Remember
when I said that going down your companionway steps is one of the most
dangerous things you do on your boat? I just met a woman who knows this all too
well. She fell going down her companionway steps a couple of months ago,
breaking several ribs. Remember the corollary advice, that a cabin is a
terrible place to fall into because there are so many things you can hit on the
way down. I’m not happy that I was right about that one.
My
chartplotter still doesn’t work right. West Marine told me the software needed
to be updated. Someone with a PC loaded it onto a SanDisk for me. I put it in
the chartplotter and nothing happened, so I took it all to West Marine. When
they inserted it, a hidden window popped up that should have updated the
software, but it didn’t happen. West Marine told me the SanDisk was empty, so I
took it back to the fellow who had loaded it for me. He put it in his computer
and found the software on the SanDisk. Meanwhile, the chartplotter’s depth
sounder told me that I was in over 20’ of water – while I was aground, centered
in a channel (that’s another story). So the chartplotter, which has an extended
warranty, is going back to West Marine, and I am going to insist that they send
it to Garmin. Stay posted and keep your paper charts handy! I know someone else
who benefited from purchasing the extended warranty, and I am now officially
recommending that.
The Cruisers and Sailing Forum continues to
talk about how small boats should just get out of the way of big ships. They
have been debating the meaning of “impede” in the COLREGS, but more and more
people are saying, “Oh for heaven’s sake. Just get out of the way!” So far,
none of those people have been kicked off the forum that I know of. I am glad
that those people have not been kicked off, and I’m glad they’re not being
harassed for displaying obvious common sense as well as expressing the true
intent of the law.
The little
boat aground by the Skyway Bridge is still there. We’ve had extreme low tides here
lately (part but not all of the grounding incident mentioned above) because of strong
north winds just blowing the water south, and with the water nearly gone it’s
clear that the entire keel of the little boat is buried in sand. That boat
isn’t going anywhere until Pinellas County decides to cut it up and haul it
away. Whoever is the registered owner will get a big bill when that happens, so
if you sell a boat, make certain
that the new owner transfers the title, or you might get a salvage bill some
day for a boat you thought you no longer owned. At least in Florida, boat
titles are not controlled as tightly as car titles are.
Go to our Facebook page: https://www.facebook.com/boldlygosailing?skip_nax_wizard=true
Go to our Facebook page: https://www.facebook.com/boldlygosailing?skip_nax_wizard=true
Tuesday, May 7, 2013
How Joe Shattered His Leg, and How He Survived
_______
May 5, 2013
You are primed to come up with a creative
solution.
Fortune cookie
Joe
lives in St. Petersburg, FL. Last December, he was going for a sail on a
friend’s boat in Venice, FL, about an hour south of his home. A 36’ boat, it
had a fair amount of freeboard –- its deck sat higher from the water than
smaller boats. Nevertheless, it was an abnormally low tide, and a bit of a drop
to the boat. Joe had gone through two knee replacement surgeries in the
previous year, so he carefully considered his options. As he was first to arrive at the boat, he would have to do this all himself.
He
pulled the boat close to the dock, and tossed his backpack into the cockpit. He
didn’t want to risk dropping anything into the water during a tricky boarding.
That also kept his center of gravity lower, always a good thing when boarding.
Holding
the boat close to the dock with his right hand, he sat on the edge of the dock and
swung his legs over the lifeline. He judged that he could make the short drop
well. Typically, stepping on to the outside of the lifelines would be the best
choice, but the boat was so low in the water that this didn’t look like a good
choice to Joe.
Unfortunately,
soon as he let go of the boat to jump down, the boat moved rapidly away from
the dock. This threw his balance off, and with his feet inside the lifelines, he
ended up hanging from the lifeline by one knee. While the knee was not injured,
his body twisted, and he broke his left femur quite badly. Fortunately the boat
had moved so far from the dock that he did not hit his head, but his body
weight pulled him into the water. Now he was in cold water, and he was badly hurt.
No
one else was around. Hollering for help brought no one.
He
managed to pull himself to the stern of the boat, and that is where the owner
of this sailboat helped save his life—even though he wasn’t anywhere near the
boat yet. The owner had tied his stern ladder up with a “half bow tie,” with
the loose end of the line long enough for Joe to reach it from the water. Here’s
a picture of the type of knot his friend used. It is also commonly used to
secure the mainsail to the boom.

Joe
managed to pull the line, drop the ladder, drag himself up the ladder and land
in the cockpit using his arms and his good leg.
Once
in the cockpit, he was able to find his cell phone in his backpack to call 911.
Since he had put his belongings in the boat before he tried to board, his
cellphone had not gone in the water with him, and so it worked. The ladder,
rigged to be deployable from the water, saved his life. With such a severe
injury he wouldn’t have survived long in cold water.
When
EMS got Joe to the nearest hospital, the doctor told him he needed immediate
surgery. “Please transfer me to St. Petersburg, where I live,” Joe asked.
“You’ll
be dead before you get there,” the doctor bluntly responded. “We have to
operate NOW.” A piece of bone had cut the femoral artery, and Joe was actually
bleeding to death inside his leg, even though the skin had not been broken. Joe
has boarded boats many hundreds of times over the years. This is the only time
he was hurt, but it was a doozy.
It’s
really important to have a good ladder on the stern of your boat. There are
several things that go into that. The ladder needs to hang from the boat at the
right angle. If it hangs at more than 90º, people will have a hard time
climbing it. Injured, it would probably be impossible. In addition, it needs to
be long enough that the lowest wrong is well down into the water, or it will be
hard to use, especially with a significant injury.
Your
ladder also needs to be rigid. I was on a boat once where the owner had made
his own ladder out of wood and rope. It floated at the surface, making it
difficult to get a foot in the bottom rung after a swim. In addition, its
flexibility let it curve under the boat. Finally my friend had to physically
hold the ladder out at a 90º angle and then I managed to get back on the boat.
A ladder is no place to try to save money. West Marine sells portable ladders
you can hang over the transom or the side. They work well. If you use this
ladder, get the longer one—it only costs $59.99 at this writing. The farther
that ladder drops (rigidly) into the water, the easier it will be for an
injured or otherwise impaired person to get safely aboard.

The
problem with this type of ladder is that most owners won’t leave it hanging on
the boat unless they are on the boat, so it probably wouldn’t have been there
when Joe needed it so desperately. However, it is highly superior to anything
made of rope and boards. A permanently installed ladder is a better choice, but
this one is a lot better than nothing, or a ladder that can’t be lowered from
the water.
Joe
survived this accident for several reasons. First, he kept his wits about him
and didn’t panic, even though he knew it could well be a fatal accident.
Second, he was familiar with the boat. He knew that ladder was there, and that
it was worth his rapidly fading strength to get to the stern. Third, the boat
owner had a ladder long enough to be useful even under extremely difficult
conditions. Fourth, the owner secured the ladder in a way that made it easy to deploy
it from the water. Finally, Joe had kept his phone safe and dry, and was able
to get to it. He does not believe he could have gotten to the marine radio in
the cabin. Without his cell phone, he would have bled to death in the cockpit.
LESSONS
LEARNED:
FIRST:
When boarding any boat with either life lines or railing, pick a place to get
on where you can place your feet on the outside
of that lifeline or rail. By the shrouds is an excellent choice: you can
step on the toe rail and grab the shrouds, which are very strong, at the same
time. Then swing one leg over the
lifeline, get that foot secure, and then bring the other leg over. This is an
expansion of rock-climbing technique: three points secure (one foot on the toe
rail and two hands on the shrouds), with one leg moving at a time. If your legs are
on the outside of those life lines
and the wind suddenly blows the boat away, even if you fall in the water, it
won’t be nearly so dangerous a fall. The only thing likely to be hurt will be
your pride. But in all likelihood, you’ll be able to keep your behind on the
dock, stay dry, and just try again, or hang on to the boat. Either way, you’re
safe.
SECOND:
Always have your boat’s safety features fully functional. Joe might have fallen
off of someone else’s boat without a good ladder, but he still might have been
able to get on his friend’s boat, and perhaps by hollering for help from the
cockpit, another person would have come along in time. Your properly secured and
adequately long, rigid ladder could save someone’s life some day.
Friday, April 12, 2013
Getting Your Anchor Up -- Safely
Or, Do as I say and not as I did!
Most people who know me know
I have figured out a number of strategies to compensate for not having the
strength of a 25-year-old linebacker in his prime along with the coordination
of a cat burglar. Too bad I don’t always use those strategies …
Today is a Friday. A week ago
Wednesday I had to put down the hook in the Manatee River. When it came time to
pull it up … I couldn’t muscle it up. So what did I do? Did I use the strategy
I had not only figured out but methodically tested, guaranteed to treat an old
body gently?
Of course not.
I tried to force it up. And
then I tried harder to force it up. After all, I’m only 67, and everyone knows
women are stronger than men …. Wait … what?????
I’m the person who has told
so many people about the nifty system I came up with for using snatch blocks to
free your anchor easily. But did I do it that day? No … I hadn’t actually set
the system up permanently, and it seemed like “too much trouble” if I could
just pull the thing up.
Now, I already knew that
those three words – “Too much trouble” – can cause chaos. Many people don’t
reef when they should because it’s “too much trouble.” I didn’t just hear
about an efficient reefing system – I had it installed on my boat. I’ve used
it. It works.
But I hadn’t actually installed
my alternate system for raising the anchor. I would have to stop and find the
parts, and then put them on. It was too much trouble when all I had to do was pull
a little harder.
Dumb, dumb, dumb.
Well, I’ll tell you what’s
too much trouble: having to go back to the doctor because the nuclear-strength
anti-inflammatory drug she put you on made your feet swell up like
watermelons, first sign of a rare but dangerous side effect of that drug.
Setting your phone to go off
at 2:30 AM to take your Prednisone – and eat something so it won’t cause an
ulcer – is a bit of bother.
And I brought it on myself because
I really banged up my left shoulder trying to force that anchor out on
muscle. I couldn’t “drive up on it” little by little because the wind had
kicked up to about 20 mph. I’d move the boat forward, but by the time I’d
gotten to the anchor rode, the wind had pushed the boat back, and the rode was
tight again. That’s a game of tag you never win if you’re on the boat by
yourself, which I usually am if I’m just moving the boat from home port to
BCYC.
So what is my really good
plan for freeing a strongly-set anchor? My boat has a perforated aluminum toe
rail. That means I can put these nifty things called “snatch blocks” anywhere on
the toe rail.
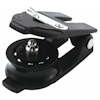
I use two snatch blocks to
guide the rode back to the cockpit. Then I just put the boat into forward with
no forward throttle, which inches the boat up, and pull the rode into the
cockpit. If that’s moving the boat too fast, I simply “goose” the engine by
moving it between neutral and forward, and then I have complete control of the
forward speed. There’s no need to steer; an anchored boat will swing into the
wind. If she swings off to the side, just give her a couple of moments to
center up. Bringing in the anchor this way, there’s no chance the rode can get
wrapped around the propeller. Then I lock
it off at the bow, and THEN I can drive the boat forward over the anchor, free it, and
pull the chain and anchor up pretty easily.
Now, my forward cleats are on
this very sturdy toe rail, so I don’t worry about ripping out a cleat. If your
cleat is mounted to fiberglass, put a good backing plate on it – and don’t
delay doing that because it’s “too much trouble.” Ripping a cleat out – now that’s too
much trouble!
So why didn’t I put the
snatch blocks on when I finally had to admit that my imitation of a gorilla in
its prime had failed and I wouldn’t be pulling it up? Simple – the “gorilla” had
already made spaghetti out of her shoulder. I was in a lot of pain and needed
help raising that anchor. So I called Boat US. They put a tow line on the front
of my boat. As they towed my boat forward, I easily pulled the rode in (no strain on the rode). When the chain
was vertical, I locked it off on the cleat, and they pulled me forward again.
It took three tries, but the anchor finally popped loose. I only had about 7 ft of
chain and the anchor to pull up then, and I managed to do that.
The doctor hopes to clear me
for full activity by May 1. That’s nearly four weeks of limited use of my left
arm – and I’m left handed. The upside is that I’m getting to know the medical
staff at my new doctor’s office pretty well.
LESSON LEARNED: Be smart. The applied uses of
the simple machines – wheels (includes blocks), levers (ex: hammer), and inclined planes (ex: wood
splitting wedge and screws), are tools
our ancestors used to move us out of the stone age and into the industrial
revolution. We should be smart enough to use them to help us do things like pull
up anchors.
I probably dodged a bit of a
bullet here. I have full range of motion in that shoulder, and they don’t think
the rotator cuff is compromised, but I was foolish.
Don’t you be foolish. I have
twice bought a set of snatch blocks by getting to marine flea markets early.
They’re out there, and they’re useful. They’re also very inexpensive at flea
markets – I recently paid only $20 apiece for them. My shoulder was worth $40! New,
they start at around $160. I’m going to put them permanently on the toe rail,
with badly applied seizing wire (on purpose) so it will take wire snips to
remove them (and have a backup set in case one of these older wonders breaks or "takes a walk" to someone else's boat).
On your boat, you may have to
install a couple of pad eyes (with backing plate) if you aren’t lucky enough to have a perforated
toe rail (put backing plates on all your deck hardware),
but none of this is hard. And, on my boat, it works. I’ve done it. Wish I’d installed it, oh, about 11 days ago …
Sorry I don’t have a picture
of the actual system up yet, but I have to let that shoulder heal some more
first. I’ll do it in a week or so.
Subscribe to:
Posts (Atom)